


Being new to the digital side of paper crafting I am finding a lot of fun & inspiration in working with the digital images out there. I have also made a few errors & figured out ways around them. I'm sharing my experiences so you don't have to do the same trial & errors that I have!! From time to time I will also update this page with any new info I come across ☺
$$: Have I mentioned the affordability of digis? WoW! You'll need a way to print and a simple Word program or photo fix (I use Media Impression). You can get whole sets of images for just a few dollars at most sites and do SO MUCH with them!!!
 |
| Both blue stripes applied identically, the darker stripes are without fixatif |
 HAND COLORING: If you've already figured out how to print out your digital image you're over half way there!! When I first went to color my freshly printed image the printer ink bled terribly into my inks & watercolors; even days later. WORKABLE FIXATIF is a great solution for this problem. Just Spray it over the printed image & wait for it to dry. Workable Fixatif also alters the way your inks flow/absorb on the page so test it out before using on your "real" project!! Here's a link to the differences I've experienced. I have also used the heat gun to "super dry" the ink on water color paper. That worked about 98% of the time.
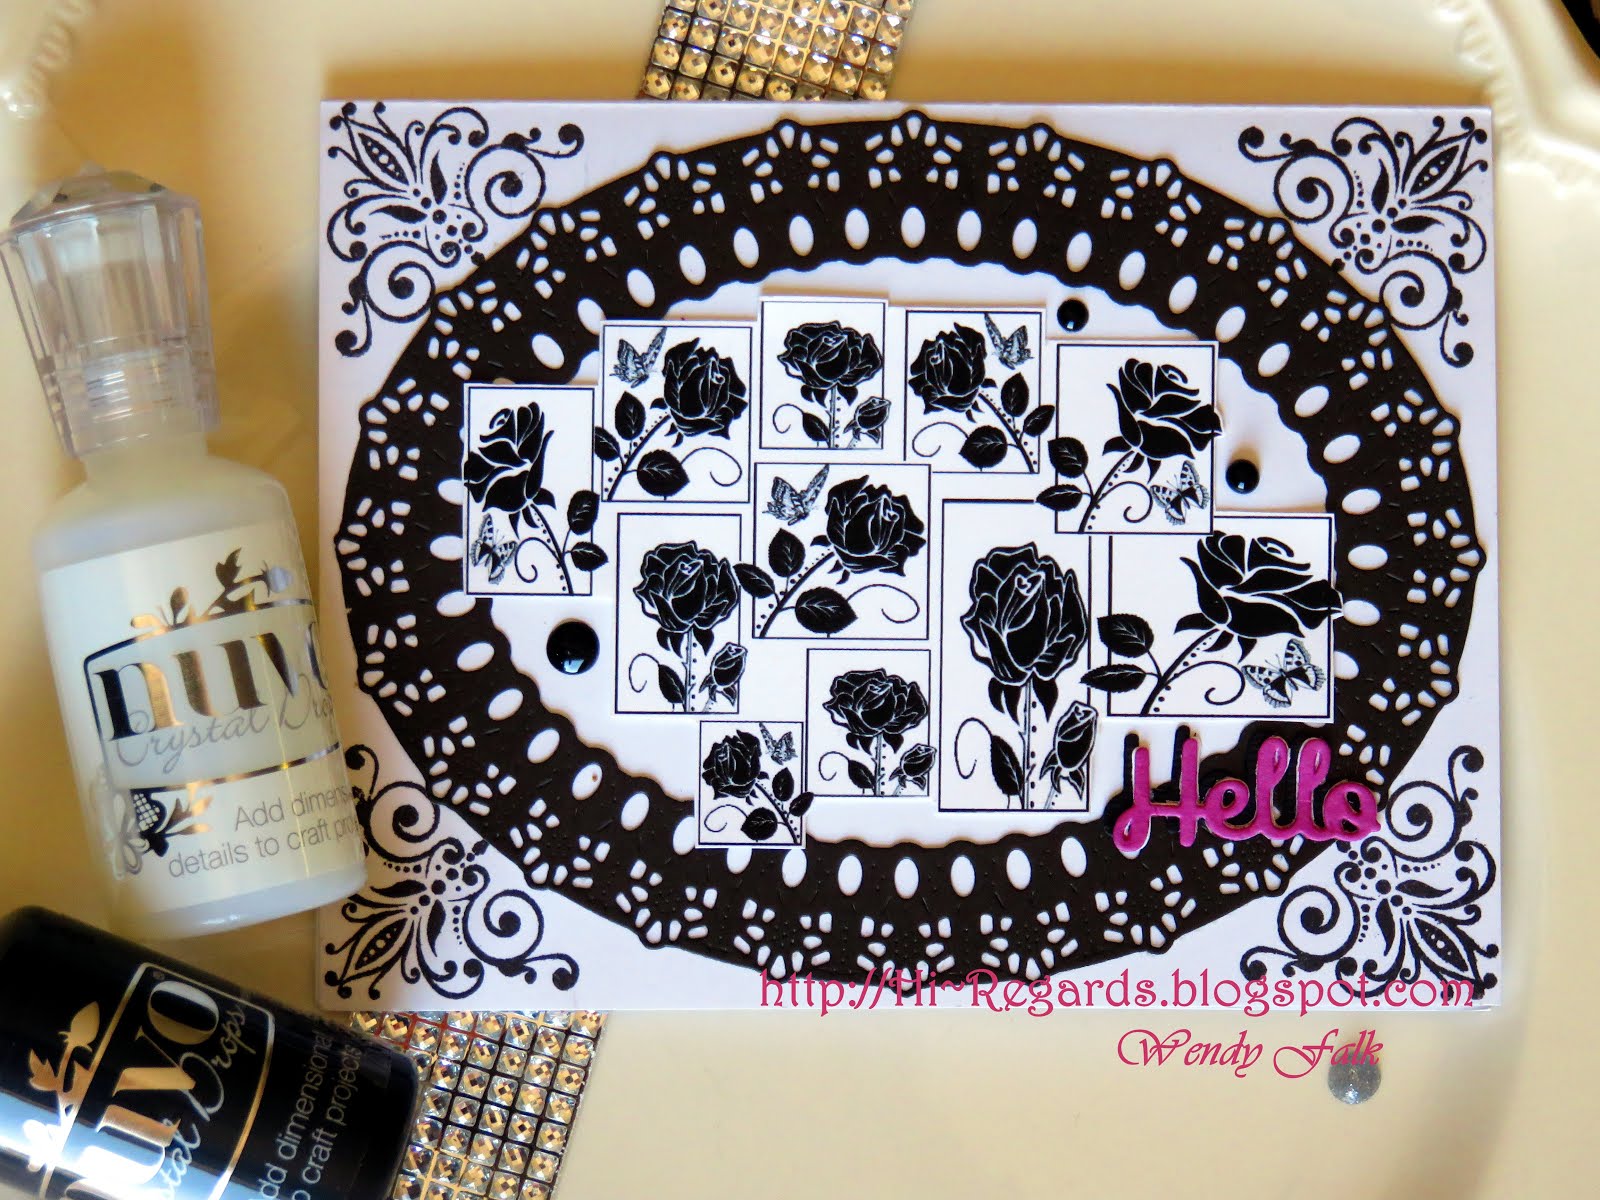
VERSITILITY: A great example of the versatility of digital stamps, using "Rose Block Trio" as an example:
 |
| The easy to use sliding color scale I use in MDIS editor |
 |
| original digital image |


If you look closely at the above you'll see that the large rose is actually part of the original stamp. With digital stamping you can reduce or enlarge any portion of the stamp that you select. In making the large rose I chose to clip out the butterfly (digitally, before I printed), enlarge it to fit my card and I also colored it on the computer using my Microsoft Digital Image Standard 2006 Editor. For the second card, in black & white, I clipped apart the three rose blocks, stretched and skewed them - then stacking them around each other until I got my desired shape and effect.
SIZING: Simple and probably self explanatory. (I no doubt do this the old fashioned way. I'm self taught so there might be easier ways to do this!!) I cut & paste the image to a Word doc, I drag the corner as a starting place to size up or down the image without losing its proportion.
You can also use the top or sides to squash or elongate the picture. For me putting this on a Word Doc ensures that I have the size correct, because I have a visual scale knowing my sheet it 8.5" x 11". I never know how it will print if I just go from my jpeg to paper!! Like I said ~ self taught!!
A link to a quick tutorial on Sizing & Selection: Ideas about combining elements from different sets while making them compatible in size!
Selection: This is maybe my most favorite part about digis!! You can use one image and "cut it up" to make it into a scene or so many different single images! The example of the rose above is a good one. A portion of the stamp was cut off to use and a portion of that was cut away (butterfly) to eliminate! Here is a great page explaining it further (click!)

in this example this is the digi image →
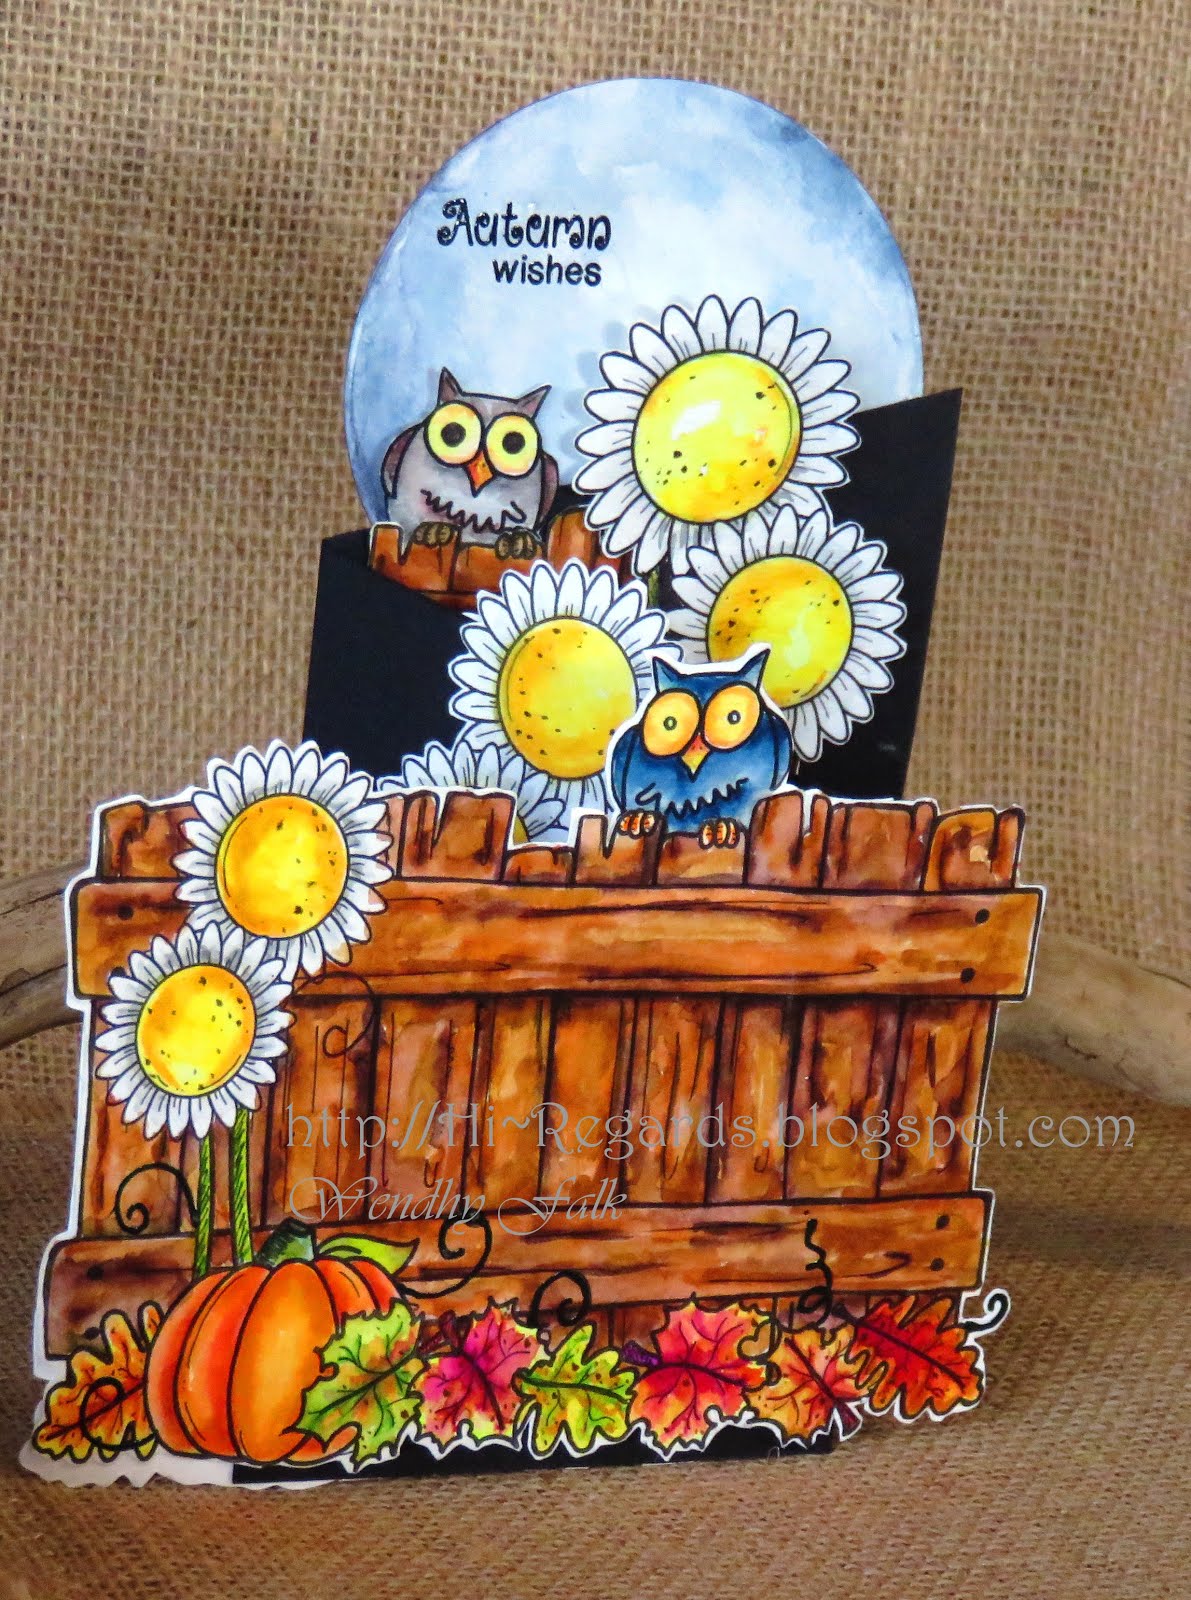
And here is one card example made using the selection process to cut out portions of the image to scene build, flip, repeat images, isolate, etc!!!!

For more information on how to get this stamp or how I digitally altered this image follow this link! Fall Fence Z-Card
I will be posting more on these subjects soon ~
COLORING:
Here's a post link that may be of help~ Coloring Digis BEFORE Printing
SPECIAL EFFECTS: Filters
Skew
Clipping
Embossing
SIZING: Simple and probably self explanatory. (I no doubt do this the old fashioned way. I'm self taught so there might be easier ways to do this!!) I cut & paste the image to a Word doc, I drag the corner as a starting place to size up or down the image without losing its proportion.
You can also use the top or sides to squash or elongate the picture. For me putting this on a Word Doc ensures that I have the size correct, because I have a visual scale knowing my sheet it 8.5" x 11". I never know how it will print if I just go from my jpeg to paper!! Like I said ~ self taught!!
A link to a quick tutorial on Sizing & Selection: Ideas about combining elements from different sets while making them compatible in size!
Selection: This is maybe my most favorite part about digis!! You can use one image and "cut it up" to make it into a scene or so many different single images! The example of the rose above is a good one. A portion of the stamp was cut off to use and a portion of that was cut away (butterfly) to eliminate! Here is a great page explaining it further (click!)

in this example this is the digi image →
And here is one card example made using the selection process to cut out portions of the image to scene build, flip, repeat images, isolate, etc!!!!

For more information on how to get this stamp or how I digitally altered this image follow this link! Fall Fence Z-Card
I will be posting more on these subjects soon ~
COLORING:
Here's a post link that may be of help~ Coloring Digis BEFORE Printing
SPECIAL EFFECTS: Filters
Skew
Clipping
Embossing
No comments:
Post a Comment
Thanks for taking the time to comment. I LOVE hearing from you!! If you would like to place an order please leave your comment here or PM me on Facebook.com Wendy Falk. I'll get back to you ASAP.